Install Kubernetes-Cluster

Install Servers

I have used Ubuntu Server 18.04 LTS.

Install one Master-Node and 3 Worker-Nodes.

! Don’t clone the Ubuntu-VMs. I had troubles with networking when I have used cloned VMs. Even though the Mac-Addresses of the interfaces were different there were troubles with networking in Kubernetes.

! Each node needs to have internet access! Because they will pull the docker images….

! You may setup your Master-Node also as Docker-Registry, so that the Nodes can pull images (self made images) from the Master.

Setup Network

We use 10.0.15.x as cluster network on a host-only vm network. In that case we set two IPs. The 192.168.163.x is the vm network, so that the VMs are accesible from your host (where the VMs are hosted on). The 10.0.15.x is the internal cluster network. Additionally we have a second interface with DHCP enabled, this interface should get a network in your public network with internet connection.

vi /etc/netplan/50-cloud-init.yaml

network:
    ethernets:
        ens33:
            dhcp4: true
            optional: true
        ens38:
            dhcp4: false
            addresses: [10.0.15.10/24, 192.168.163.10/24]
> netplan apply
> vi /etc/hosts

10.0.15.10  master
10.0.15.21  worker01
10.0.15.22  worker02
10.0.15.23  worker02
> hostnamectl set-hostname master  
> reboot

Install Docker

> apt install docker.io -y  

Systemd must be used for cgroupdriver in docker

> cat > /etc/docker/daemon.json <<EOF
{
  "exec-opts": ["native.cgroupdriver=systemd"],
  "log-driver": "json-file",
  "log-opts": {
    "max-size": "100m"
  },
  "storage-driver": "overlay2",
  "insecure-registries" : ["master:5000"]   
}
EOF
> mkdir -p /etc/systemd/system/docker.service.d
> systemctl daemon-reload
> systemctl restart docker

Install Docker Registry on Master

> docker run -d -p 5000:5000 --restart=always --name registry registry:2

add your Registry server as insecure registry to /etc/docker/daemon.json, if you haven’t it done in one of the previous steps.

{   
  "insecure-registries" : ["master:5000"]   
}   

push an image to your Registry server:

> docker tag <image> master:5000/<image>   # tag your image
> docker push master:5000/<image>  # push your image

Install Kubernetes

Disable Swap

> swapon -s  
> swapoff -a  
> vim /etc/fstab  # comment out line with swap device  
> reboot  
> apt install -y apt-transport-https  
> curl -s https://packages.cloud.google.com/apt/doc/apt-key.gpg | apt-key add -  
> echo "deb http://apt.kubernetes.io/ kubernetes-xenial main" > /etc/apt/sources.list.d/> kubernetes.list  
> apt update  
> apt install -y kubeadm kubelet kubectl  

Master Node Cluster Initalization

> kubeadm config images pull
> kubeadm init --pod-network-cidr=10.244.10.0/16 --apiserver-advertise-address=10.0.15.10  

Your Kubernetes control-plane has initialized successfully!

To start using your cluster, you need to run the following as a regular user:

> mkdir -p $HOME/.kube
> sudo cp -i /etc/kubernetes/admin.conf $HOME/.kube/config
> sudo chown $(id -u):$(id -g) $HOME/.kube/config

You should now deploy a pod network to the cluster (use a regular user)

> kubectl apply -f https://raw.githubusercontent.com/coreos/flannel/master/Documentation/kube-flannel.yml

or

> kubectl apply -f "https://cloud.weave.works/k8s/net?k8s-version=$(kubectl version | base64 | tr -d 'n')"

Check the state

> kubectl get nodes  
> kubectl get pods --all-namespaces

Join Worker Node(s)

Then you can join any number of worker nodes by running the following on each as root at the worker nodes (copy this from the outpout kubeadm init)

> kubeadm join 10.0.15.10:6443 --token w8vr52.wtful961u754ev8b 
    --discovery-token-ca-cert-hash sha256:b07d512632b0117bfe81716b57d0c00b64cabd8222c5ffae04f447291a7c16f8

check if the nodes have been joined:

> kubectl get nodes
Use Local Docker Registry

Start Local Registry

docker run -d -p 5000:5000 --restart=always --name registry -v /data/registry:/var/lib/registry registry:2
cat /etc/docker/daemon.json  
{   
  "insecure-registries" : ["myhost:5000"]   
}   
docker tag <image> myhost:5000/<image>  
docker push myhost:5000/<image>

Load Image via SSH

cat xxx.img | ssh root@worker02 "docker load"

Get Only Image Names

docker images --format "{{.Repository}}"

Setup MicroK8S

Install

Add the following lines to /etc/docker/daemon.json:
{
    "insecure-registries" : ["localhost:32000"]
}
> snap install microk8s --classic --channel=1.17/stable  

> microk8s.status  

> microk8s.stop  # Stops all MicroK8s services  
> microk8s.start  # Starts MicroK8s after it is being stopped  

Alias

> alias kubectl='microk8s.kubectl'  
> alias k='microk8s.kubectl'  

Status

> k get all  
> k get all --all-namespaces

> k cluster-info

> k get pods -o wide

Dashboard

> microk8s.enable dns dashboard  

Get token for dashboard
> token=$(microk8s.kubectl -n kube-system get secret | grep default-token | cut -d " " -f1)  
> microk8s.kubectl -n kube-system describe secret $token  

Grafana

> cluster-info # url for grafana  
> microk8s.config # username and password  

Enable Helm

> microk8s.enable helm  
> microk8s.helm init  

Local Images

microk8s.ctr image import myimage.tar
microk8s.ctr images ls

Kibana and PgAdmin4 with NGINX Reverse Proxy on Docker…

If you have multiple services running on Docker with different ports, you have to open ports in your firewall and you have to access the services via different ports in the browser. To have one access port (port 80 or 443) you can use a reverse proxy.

In our case we used NGINX to redirect the access to Kibana (Elasticsearch Dashboard Tool) and PgAdmin4 (PostgreSQL Admin Tool) so that we can access both services on the same port (80) in the browser with different base paths: http://localhost/kibana and http://localhost/pgadmin.

docker-compose.yml:

version: '3.0'
services:
  elasticsearch:
    hostname: elasticsearch
    image: elasticsearch:7.5.0
    ports:
      - 9200:9200
      - 9300:9300
    volumes:
      - esdata:/usr/share/elasticsearch/data
    environment:
      - discovery.type=single-node
      - "ES_JAVA_OPTS=-Xms512m -Xmx512m"  

  kibana: 
    hostname: kibana
    image: kibana:7.5.0
    depends_on:
      - elasticsearch        
    environment:
      - XPACK_MONITORING_ENABLED=false
      - LOGGING_QUIET=true
      - SERVER_BASEPATH=/kibana
      - SERVER_REWRITEBASEPATH=true    

  postgres:
    hostname: postgres
    image: postgres:12.1
    ports:
      - 5432:5432
    volumes:
      - postgresdb:/var/lib/postgresql/data
    environment:
      - POSTGRES_PASSWORD=manager

  pgadmin: 
    hostname: pgadmin
    image: dpage/pgadmin4
    volumes:
      - pgadmin:/var/lib/pgadmin
    environment:
      - PGADMIN_DEFAULT_EMAIL=postgres
      - PGADMIN_DEFAULT_PASSWORD=manager
      - GUNICORN_ACCESS_LOGFILE=/dev/null

  proxy:
    hostname: proxy
    image: nginx:1.17.8
    ports:
      - 80:80
    volumes:
      - ./nginx.conf:/etc/nginx/nginx.conf
    depends_on:
      - kibana 
      - pgadmin  

volumes:  
  esdata:
  postgresdb:
  pgadmin:

nginx.conf


user  nginx;
worker_processes  auto;

error_log  /var/log/nginx/error.log warn;
pid        /var/run/nginx.pid;


events {
    worker_connections  1024;
}


http {
    include       /etc/nginx/mime.types;
    default_type  application/octet-stream;

    log_format  main  '$remote_addr - $remote_user [$time_local] "$request" '
                      '$status $body_bytes_sent "$http_referer" '
                      '"$http_user_agent" "$http_x_forwarded_for"';

    access_log  /dev/null;

    sendfile        on;
    #tcp_nopush     on;

    keepalive_timeout  65;

    #gzip  on;

    server {
        listen 80;

        root /var/www;
        index index.html;

        location / {
            try_files $uri $uri/ =404;
        }
        
        location /pgadmin {
            proxy_pass http://pgadmin/;
            proxy_http_version 1.1;
            proxy_set_header X-Script-Name /pgadmin;
            proxy_set_header Upgrade $http_upgrade;
            proxy_set_header Connection 'upgrade';
            proxy_set_header Host $host;
            proxy_cache_bypass $http_upgrade;
        }

        location /kibana {
            proxy_pass http://kibana:5601/kibana;
            proxy_http_version 1.1;
            proxy_set_header Upgrade $http_upgrade;
            proxy_set_header Connection 'upgrade';
            proxy_set_header Host $host;
            proxy_cache_bypass $http_upgrade;
        }                    
    }
}

Store Docker Logs in Elasticsearch with Filebeat…

Create a filebeat configuation file named “filebeat.yaml”

filebeat.config:
  modules:
    path: ${path.config}/modules.d/*.yml
    reload.enabled: false

filebeat.autodiscover:
  providers:
    - type: docker
      hints.enabled: true

processors:
- add_cloud_metadata: ~

setup.ilm:
  enabled: false

output.elasticsearch:
  hosts: '${ELASTICSEARCH_HOSTS:elasticsearch:9200}'
  username: '${ELASTICSEARCH_USERNAME:}'
  password: '${ELASTICSEARCH_PASSWORD:}'

Create a docker-compose.yaml file

version: '3.0'
services:
  elasticsearch:
    hostname: elasticsearch
    image: elasticsearch:7.5.0
    ports:
      - 9200:9200
      - 9300:9300
    volumes:
      - esdata:/usr/share/elasticsearch/data
    environment:
      - discovery.type=single-node
      - "ES_JAVA_OPTS=-Xms512m -Xmx512m"
  kibana: 
    hostname: kibana
    image: kibana:7.5.0
    ports: 
      - 5601:5601
    depends_on:
      - elasticsearch        
    environment:
      - XPACK_MONITORING_ENABLED=false
      - LOGGING_QUIET=true
  filebeat:
    user: root
    hostname: filebeat
    image: docker.elastic.co/beats/filebeat:7.5.1
    command: filebeat -e -strict.perms=false
    volumes:
      - ./filebeat.yaml:/usr/share/filebeat/filebeat.yml
      - /var/lib/docker/containers:/var/lib/docker/containers:ro
      - /var/run/docker.sock:/var/run/docker.sock:ro
    environment:
      - output.elasticsearch.hosts=["elasticsearch:9200"]
    depends_on:
      - elasticsearch
volumes: 
  esdata:

Startup the docker containers

docker-compuse up -d

Then you can access the logs via Kibana in the browser: http://localhost:5601/

Native Image with GraalVM

  1. Get the Windows version of GraalVM: https://github.com/oracle/graal/releases
  2. Extract it to C:\app
  3. Uninstall any Visual C++ 2010 Redistributables
  4. Get the Microsoft Windows SDK for Windows 7 and .NET Framework 4 (ISO): https://www.microsoft.com/en-us/download/details.aspx?id=8442
    Use the GRMSDKX_EN_DVD.iso
  5. Mount the image and runF:\Setup\SDKSetup.exe 
  6. Run the Windows SDK 7.1 Command Prompt by going to Start > Microsoft Windows SDK v7.1 > Windows SDK 7.1 Command Prompt

c:\app\graalvm-ce-19.2.1\bin\native-image -jar Example.jar ^
--no-fallback ^
--report-unsupported-elements-at-runtime ^
--allow-incomplete-classpath ^

IIS Reverse Proxy Configuration

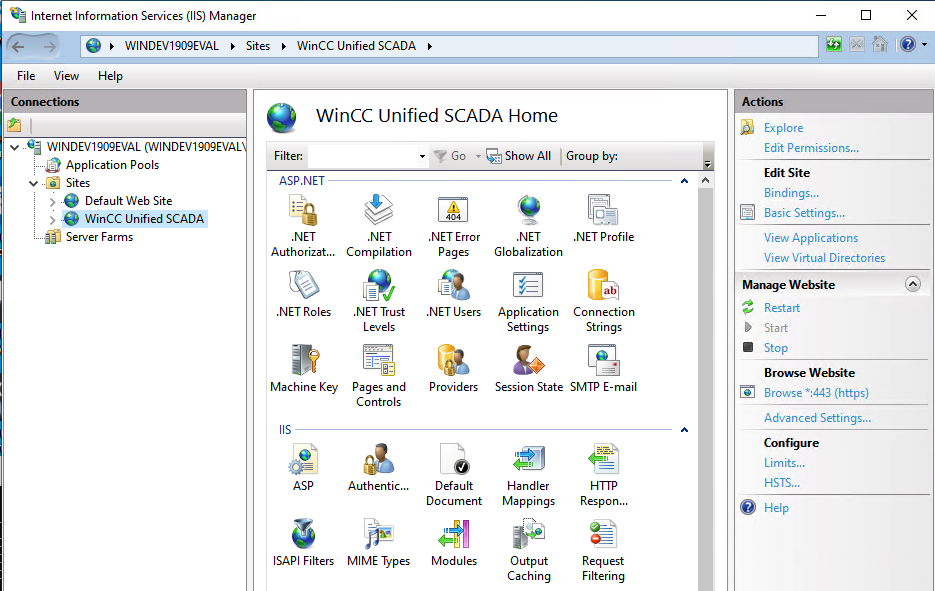
If you need to add a reverse proxy to your Internet Information Server (IIS) you can just add a rule to your site configuration file. In the following example we add a reverse proxy (url rewrite) for a GraphQL Server to our WinCC Unified WebRH. Afterwards restart the site with the IIS services manager.

IIS Configuration File: 
"C:\Program Files\Siemens\Automation\WinCCUnified\SimaticUA\web.config"

<configuration>
  <system.webServer>
    <rewrite>
      <outboundRules>
        <rule name="Remove Server header">
          <match serverVariable="RESPONSE_Server" pattern=".+" />
          <action type="Rewrite" value="" />
        </rule>
      </outboundRules>
            <rules>
                <rule name="Reverse Proxy to GraphQL" stopProcessing="true">
                  <match url="^graphql" />
                  <action type="Rewrite" url="http://localhost:4000/graphql" />
                </rule>      
               
                <rule name="UMC SSO Static">
                    <match url="(.*)" />
                    <conditions>
                        <add input="{URL}" pattern="(.*)\/umc-sso(.*)" />
                    </conditions>
                    <serverVariables>
                        <set name="HTTP_COOKIE" value="{HTTP_COOKIE};ReverseProxyHost={HTTP_HOST};ReverseProxyPort={SERVER_PORT}" />
                    </serverVariables>
                    <action type="Rewrite" url="http://localhost:8443/umc-sso{C:2}" />
                </rule>  
            </rules>
    </rewrite>
...

More examples for rewrite rules

<rewrite>
    <rules>
        <rule name="Reverse Proxy to webmail" stopProcessing="true">
            <match url="^webmail/(.*)" />
            <action type="Rewrite" url="http://localhost:8081/{R:1}" />
        </rule>
        <rule name="Reverse Proxy to payroll" stopProcessing="true">
            <match url="^payroll/(.*)" />
            <action type="Rewrite" url="http://localhost:8082/{R:1}" />
        </rule>
    </rules>
</rewrite>

Restart site with “Internet Information Services (IIS) Manager”

WinCC OA OPC UA Server

For testing sometimes it is too hard to deal with security :-). To make the OPC UA server in WinCC OA unsecure add the following lines to the config file.

[opcuasrv]
disableSecurity = 1
enableAnonymous = 1

Add the WCCOAopcuasrv manager to the project and start it.

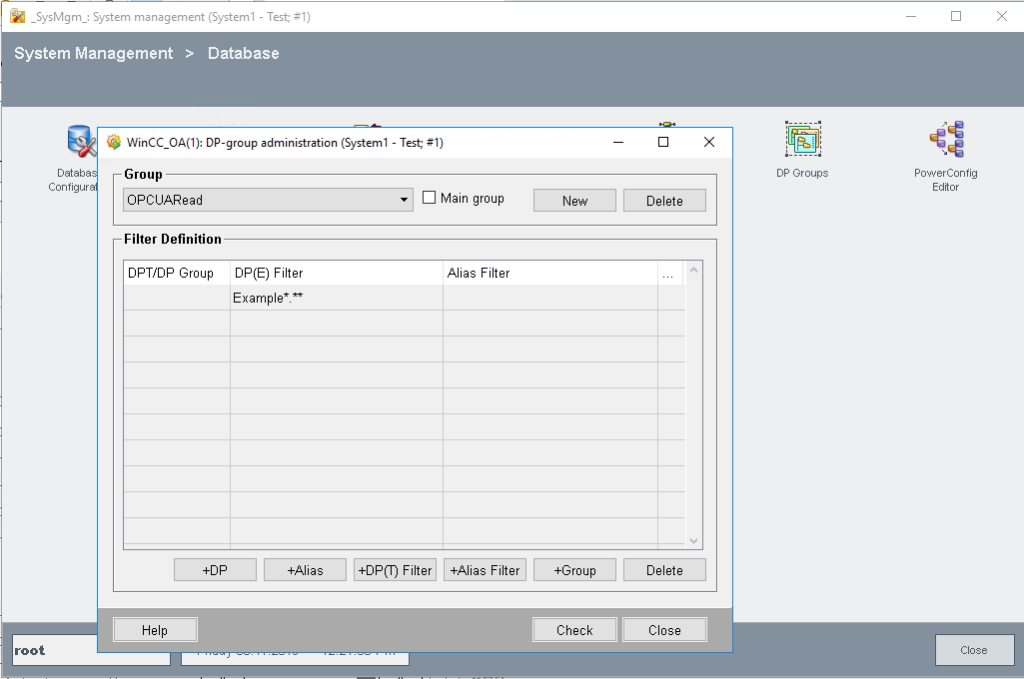
To publish datapoints don’t forget to add the datapoints to the DP groups “OPCUARead” and “OPCUAWrite”.

Size of tables in PostgreSQL vs Apache Cassandra…

PostgreSQL table with ts+key as primary key:  ~43GB

PostgreSQL wide column table with ts as primary key : 247GB
Cassandra wide column table with ts as primary  key: 4.5GB

Strange that in PostgreSQL a table with much less rows (but much more columns) needs a lot of more space (both tables store the same amount of data). )

It seems that the Apache Cassandra Column Store can compress the columns pretty good – factor 10 less disk space!

The source table in PostgreSQL (TimescaleDB) with a timestamp and a key column and 8 data columns had about 170 Mio rows.

CREATE TABLE candles
(
    instrument character varying(10) NOT NULL,
    ts timestamp(3) without time zone NOT NULL,
    o numeric,
    h numeric,
    l numeric,
    c numeric,
    primary key (instrument, ts)
)

I needed to flatten the table so that i have just the timestamp as primary key and many columns and each column is of a type. It ends up in a table with about 1.6 Mio rows and many columns.

CREATE TYPE price AS (
    o       float,
    c       float,
    h       float,
    l       float,
    volume  float
);

CREATE TABLE candles_wide
(
   ts timestamp(3) without time zone NOT NULL,
   AU200_AUD price,
   AUD_CAD price,
   AUD_CHF price,
   AUD_HKD price,
   AUD_JPY price,
   AUD_NZD price,
   ... 124 columns

Apache Cassandra wide column store table with ts as primary key and many columns.

CREATE TABLE candles (ts timestamp,
   AU200_AUD tuple<float,float,float,float,float>,    
   AUD_CAD tuple<float,float,float,float,float>,  
   AUD_CHF tuple<float,float,float,float,float>,  
   ... 124 tuples