Click the application in question on the task bar and press:
Windows-Key + Up ==> Maximize
Windows-Key + Left ==> place to left
Windows-Key + Right ==> place to right
Windows-Key + Down ==> Restore-Size
Oracle Apex RESTful Services…
To use RESTful Oracle Apex Services following grant has to be done:
alter user
Export Oracle APEX Applications of Workspace
How to export all applications of an Oracle APEX Workspace:
export CLASSPATH=.:/app/oracle/product/11.2.0/dbhome_1/jdbc/lib/ojdbc5.jar:/app/apex/utilities
java oracle.apex.APEXExport -db localhost:1521:ORCL -user system -password
/app/apex ==> Oracle APEX Installation-Directory
ORA-28014: cannot drop administrative users (Oracle 12c)
SQL> drop user apex_040200 cascade;

drop user apex_040200 cascade

*

ERROR at line 1:

ORA-28014: cannot drop administrative users
SQL> alter session set "_oracle_script"=true;
Session altered.
SQL> drop user apex_040200 cascade;
User dropped.
Oracle 12c Global Temporary Tables & Undo & Redo…
Oracle-Magazin: http://www.oracle.com/technetwork/issue-archive/2013/13-nov/o63asktom-2034271.html
Starting in Oracle Database 12c, temporary undo can be stored in the temporary tablespace and undo for permanent objects can be stored in the undo tablespace. What this effectively means is that operations on temporary tables will no longer generate redo.
How undo is generated in Oracle Database 12c for global temporary tables is controlled by a new init.ora parameter: temp_undo_enabled. It has two settings: TRUE and FALSE. By default, this parameter is set to FALSE and undo will be generated in the same fashion it was in the past. For example:
SQL> alter session

set temp_undo_enabled = false;
Session altered.
SQL> insert into gtt
2 select *
3 from all_objects;
87310 rows created.
Statistics
———————————————————————————
…
566304 redo size
…
SQ> update gtt
2 set object_name =
lower(object_name);
87310 rows updated.
Statistics
————————————————————————————
…
8243680 redo size
…
As you can see, the INSERT generates about half a megabyte of redo (566,304 bytes) while the UPDATE generates upwards of 8 MB of redo (8,243,680 bytes). If I enable temporary undo, however:
SQL> alter session
set temp_undo_enabled = true;
Session altered.
SQL> insert into gtt
2 select *
3 from all_objects;
87310 rows created.
Statistics
———————————————————————————————
…
280 redo size
…
SQL> update gtt
2 set object_name =
lower(object_name);
87310 rows updated.
Statistics
———————————————————————————————
…
0 redo size
…
RDB-Manager Oracle Scheduler Jobs
SELECT * FROM dba_scheduler_jobs WHERE job_name = 'J_ARCHIVEMON'

SELECT * FROM dba_scheduler_job_log WHERE job_name = 'J_SWITCHMON'
purge scheduler logs:
BEGIN
dbms_scheduler.purge_log;
END;
Moving ASM Database Files from one Diskgroup to Another
select file_name from dba_data_files order by file_name;
RMAN> copy datafile '+DATA/db/datafile/pvssrdb_values_00100002i.264.817770521' to '+PVSS';
SQL> alter database datafile '+DATA/db/datafile/pvssrdb_values_00100002i.264.817770521' offline;
RMAN> switch datafile '+DATA/db/datafile/pvssrdb_values_00100002i.264.817770521' to copy;
SQL> select file_name from dba_data_files order by file_name;
RMAN> recover datafile '+PVSS/db/datafile/pvssrdb_values_00100002i.258.844976215';
SQL> alter database datafile '+PVSS/db/datafile/pvssrdb_values_00100002i.258.844976215' online;
ASMCMD> rm PVSSRDB_VALUES_00100002I.264.817770521
or
ASMSQL> ALTER DISKGROUP DATA DROP FILE '+DATA/db/datafile/pvssrdb_values_00100002i.264.817770521';
WinCC OA RDB-Manager Config & Database Settings…
WinCC OpenArchitecture using Oracle RDB-Manager…
*) Oracle db_files
*) Oracle logfile size
*) Oracle Password-Lifetime
*) Example WinCC OA config file
*) TCP/IP timeout settings on windows
*) WinCC OA Archive Group Sizing
Oracle db_files
===============
alter system set db_files=65536 scope=both;
Oracle logfile size
===================
For huge load (>1000 values/second) logfile size should be increased!
select * from v$logfile;
alter database add logfile size 512M;
alter database add logfile size 512M;
alter database add logfile size 512M;
remove other/small logfiles. If the logfiles are the current one then you have to switch the logfile and initiate a checkpoint before you are able to remove the old one.
alter system switch logfile;
alter system checkpoint;
alter database drop logfile group
Oracle Password-Life-Time
=========================
To prevent password expiration the default profile should be changed.
alter profile default limit password_life_time unlimited;
WinCC OA Config
===============
[general]

useRDBArchive = 1

useRDBGroups = 1
[data]
sendAlertsToRAIMA=1 # for HDB/RDB Parallel
[ValueArchiveRDB]
DbUser = "PVSSRDB"
DbPass = "xxx"
DbType = "ORACLE"
Db = "DB"
writeWithBulk = 1
[ctrl]
queryRDBdirect = 1
CtrlDLL = "CtrlADO"
CtrlDLL = "CtrlRDBArchive"
CtrlDLL = "CtrlRDBCompr"
[ui]
queryRDBdirect = 1
CtrlDLL = "CtrlADO"
CtrlDLL = "CtrlRDBArchive"
CtrlDLL = "CtrlRDBCompr"
Example TNSNAMES.ORA for a cluster with two networks:
DB =

(DESCRIPTION =

  (ENABLE=BROKEN)

  (ADDRESS_LIST=

   (ADDRESS = (PROTOCOL = TCP)(HOST = mainhdr1-vip)(PORT = 1521))

   (ADDRESS = (PROTOCOL = TCP)(HOST = mainhdr1b-vip)(PORT = 1522))

  )

  (ADDRESS_LIST=

   (ADDRESS = (PROTOCOL = TCP)(HOST = mainhdr2-vip)(PORT = 1521))

   (ADDRESS = (PROTOCOL = TCP)(HOST = mainhdr2b-vip)(PORT = 1522))

  )

  (CONNECT_DATA =

   (SERVICE_NAME = DB)

   (FAILOVER_MODE =

   (TYPE = SELECT)

   (METHOD = BASIC)

   (RETRIES = 20)

   (DELAY = 5)

  )

 )

)
Windows TCP/IP Timeout
======================
Also the tcp/ip timeout on windows should be decreased:
Set the following registry entry (or create if it does not exist): KeepAliveTime
Key: HKEY_LOCAL_MACHINE\SYSTEM\CurrentControlSet\Services\Tcpip\Parameters
Value type: REG_DWORD – Time in milliseconds
Range: 1 – 0xFFFFFFFF
Default value: 7.200.000 (two hours)
For example this value can be set to 180000 (decimal), equals 3 minutes.
WinCC OA Archive Group Sizing
=============================
Increase the max archive group size of existing (EVENT, ALERT) and new archives. The default size of 1GB is really damn small. Think about the max. db_files parameter (each archive file switch creates a new db file). Sizes of 20GB+ is no problem for Oracle. But keep in mind that there are file size limits (RDB Manager does not use Oracle Big-File-Tablespaces). For a block size of 8k the max file size is 32GB.
Block Size Maximum Datafile File Size
———– —————————
2k 4194303 * 2k = 8 GB
4k 4194303 * 4k = 16 GB
8k 4194303 * 8k = 32 GB
16k 4194303 * 16k = 64 GB
32k 4194303 * 32k = 128 GB
WinCC OA Online Panel Language Translator (Google Translate API)…
Automatic language translation of WinCC OA Panels with Google-Translate. Service for Message-Catalogs and Datapoint-List will be added (soon?)…
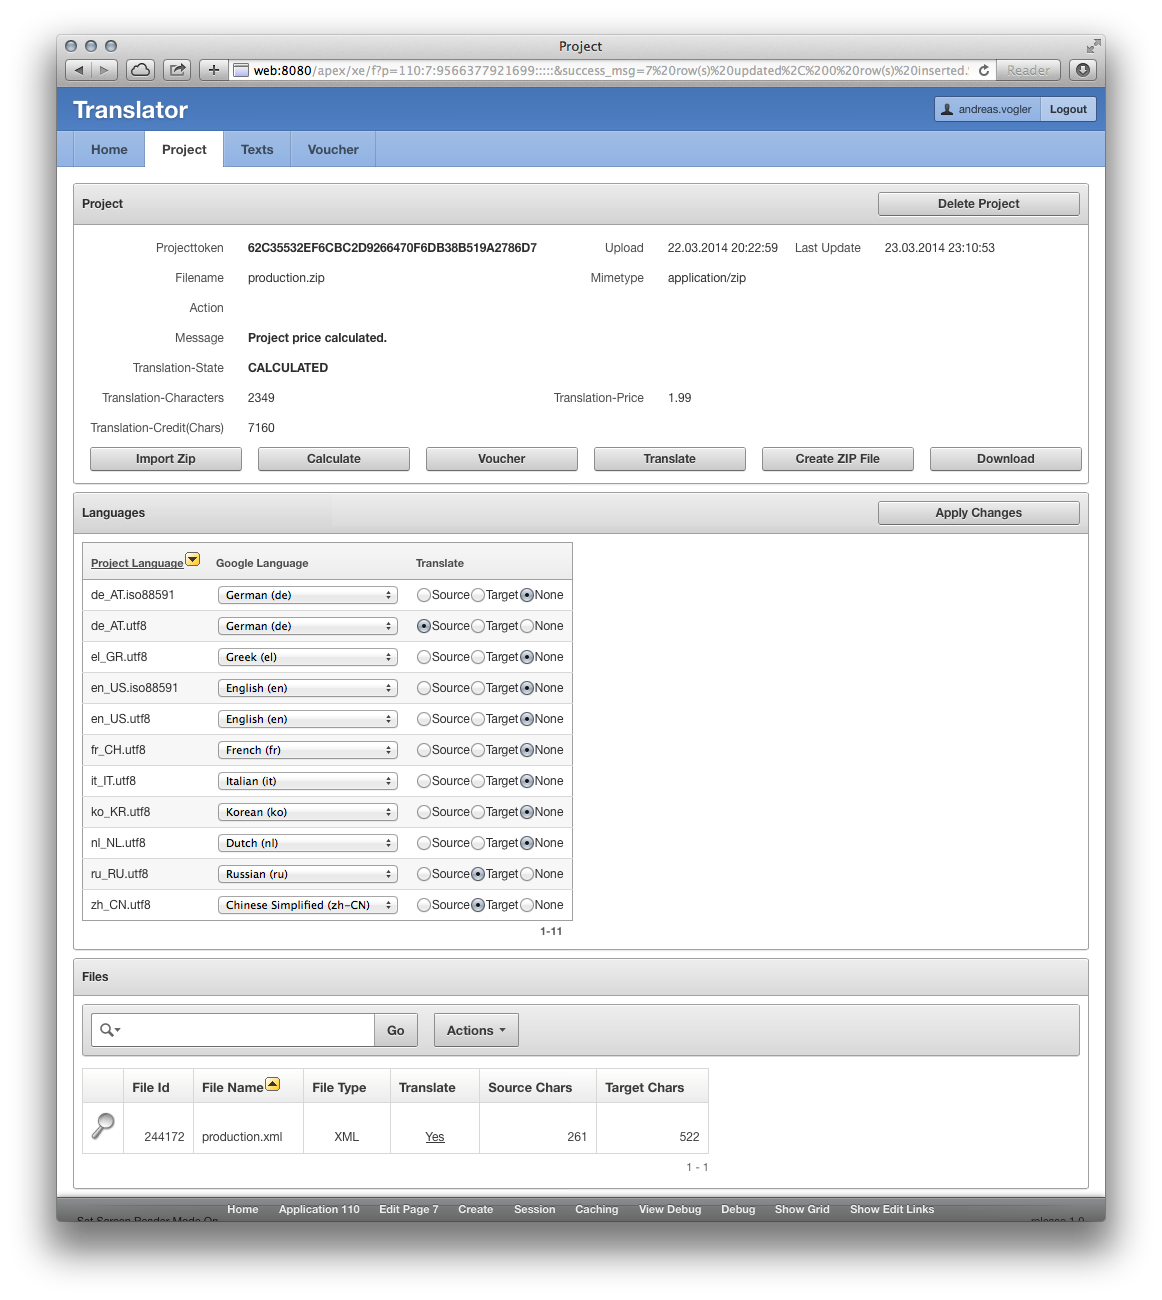
* Upload and import the panel-xml-files as a ZIP.
* Select source language and target language(s).
* Calculate the costs – Google-Translate-API is not for free, as well as this service isn’t – but one Coin/Panel is for free.
* Pay the fee with the RocWallet (In-App-Purchase)
* Start the translation
* Create Result-ZIP file
* Download ZIP & start your project…
Upload project zip…
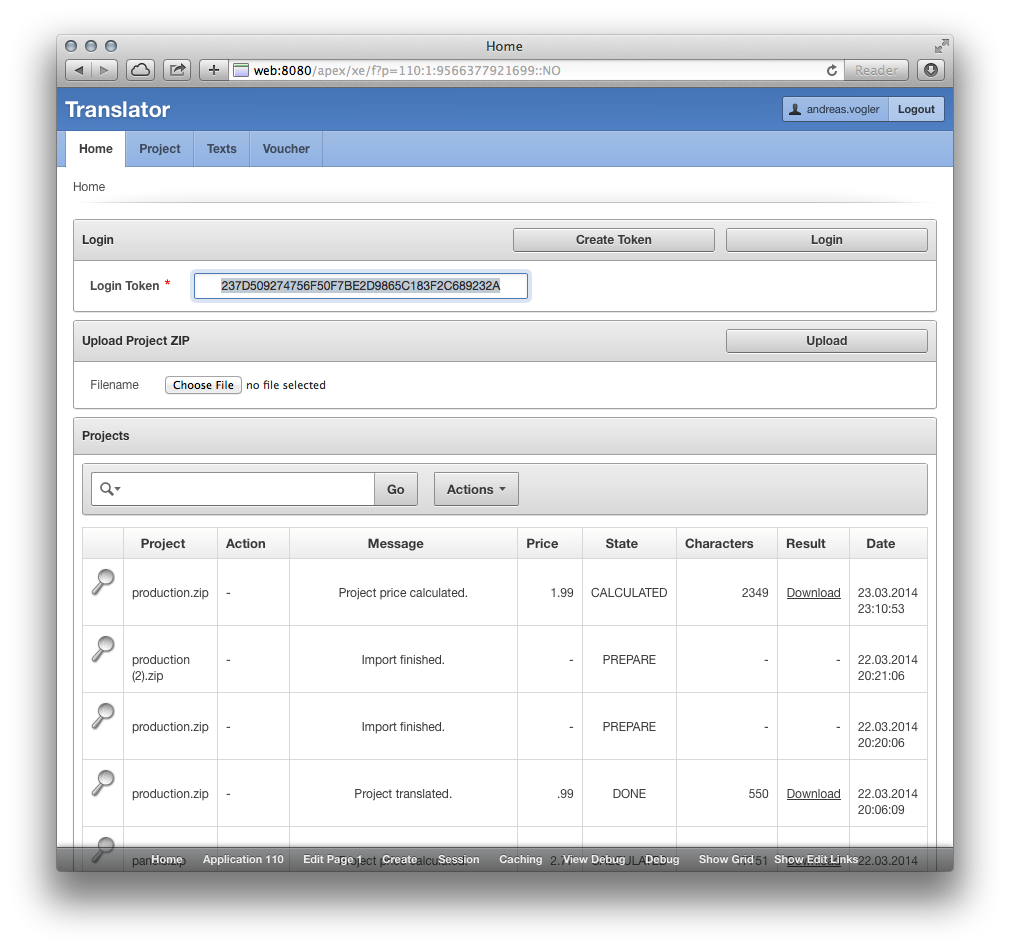 Import, select languages, translate…
Order voucher and pay with mobile phone: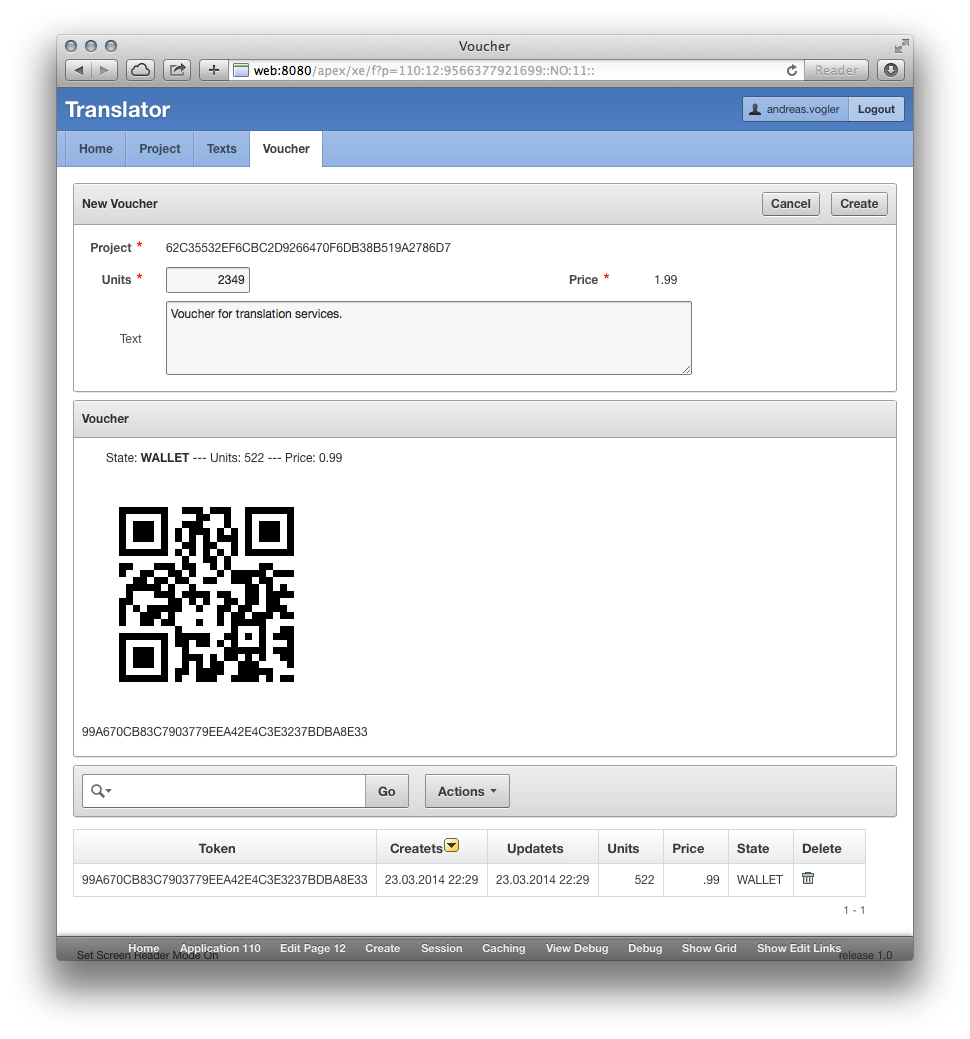
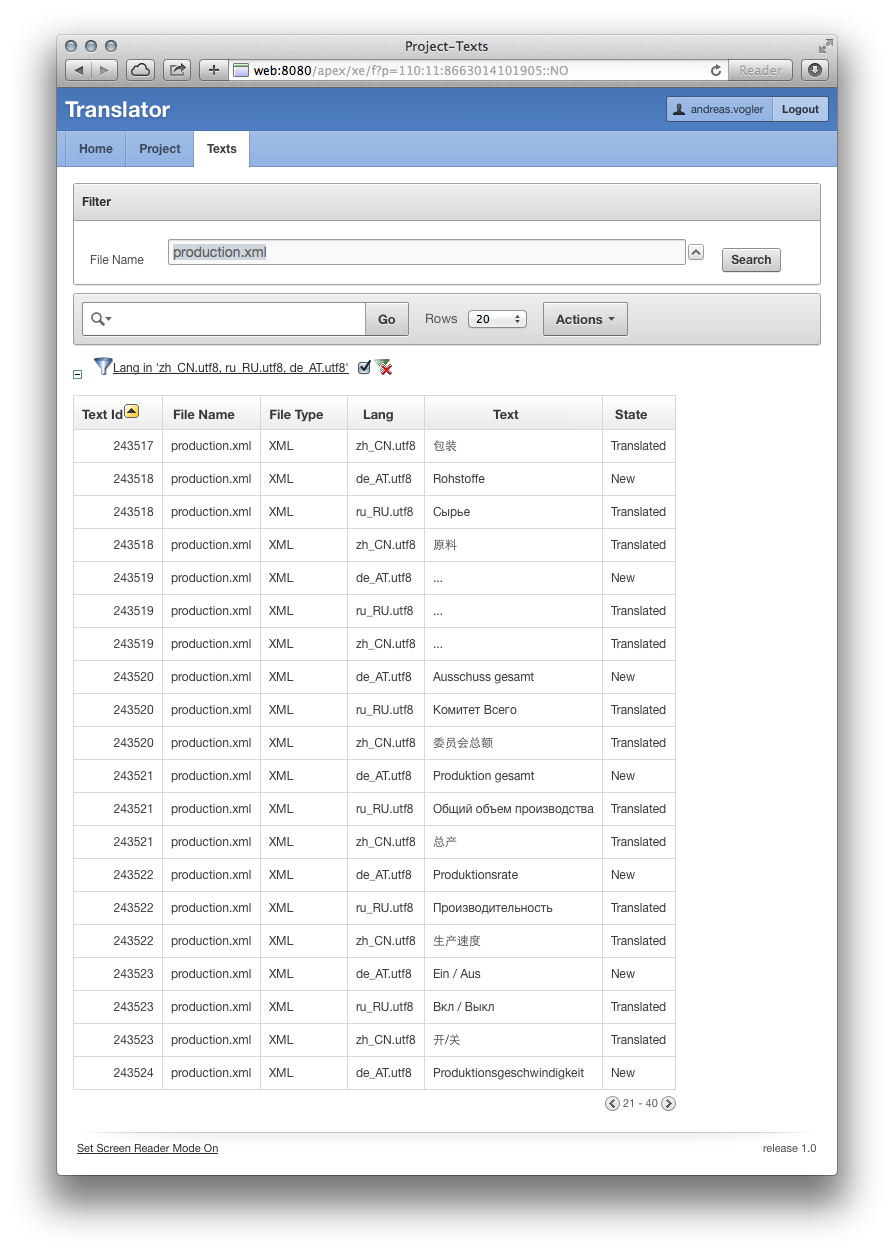
Review translated language texts:
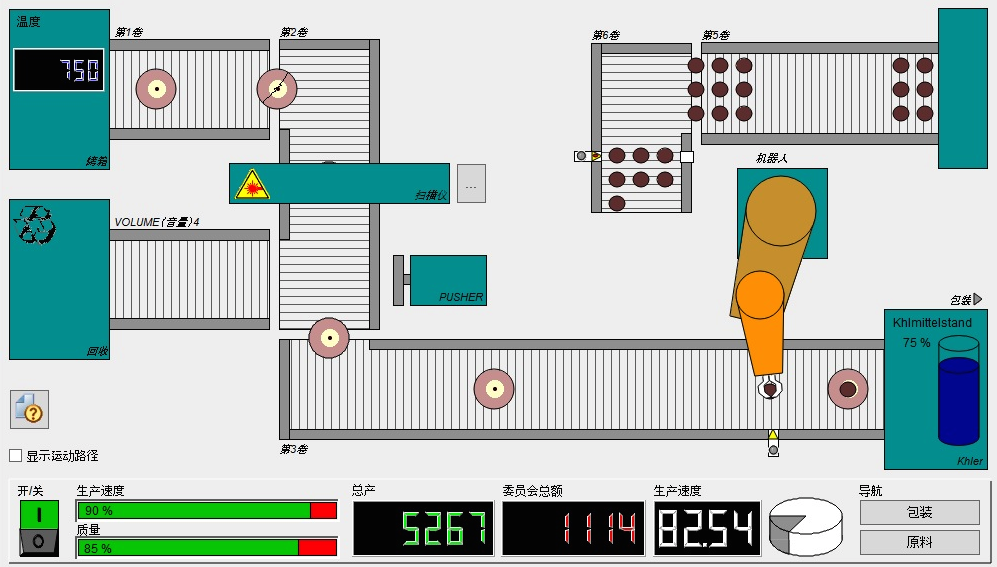
Result: Chinese Translation
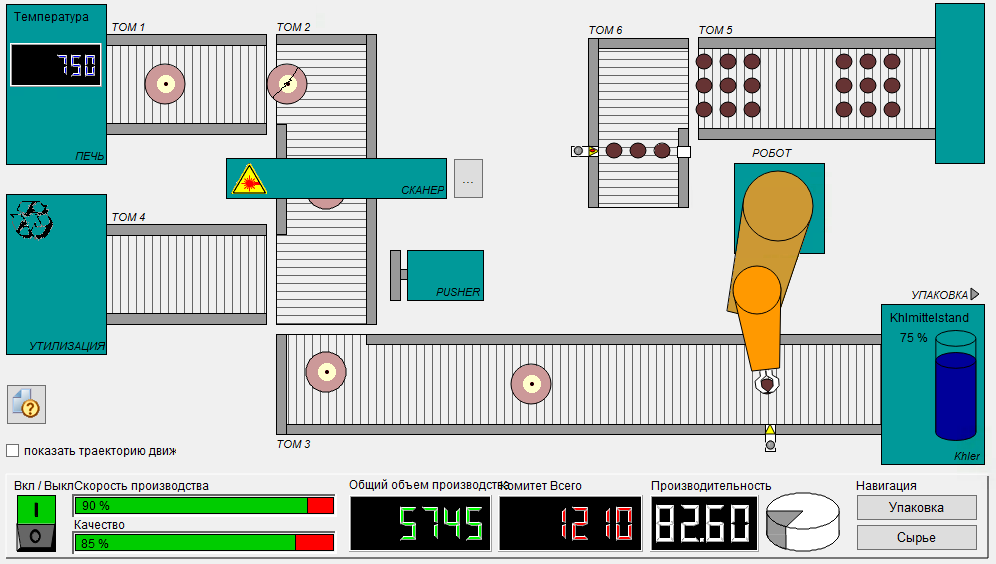
Result: Russian Translation
Oracle Apex Blob as Download-Link…
First of all you have to select the blob column like this:
select project_id, mimetype, filename, dbms_lob.getlength(“OUTPUT”) AS output
from TR_PROJECT t
order by uploadts desc
If not you will get an error message.
AS Number/Date Format use a string like this:
DOWNLOAD:TR_PROJECT:OUTPUT:PROJECT_ID::MIMETYPE:FILENAME:::Attachment:Download

